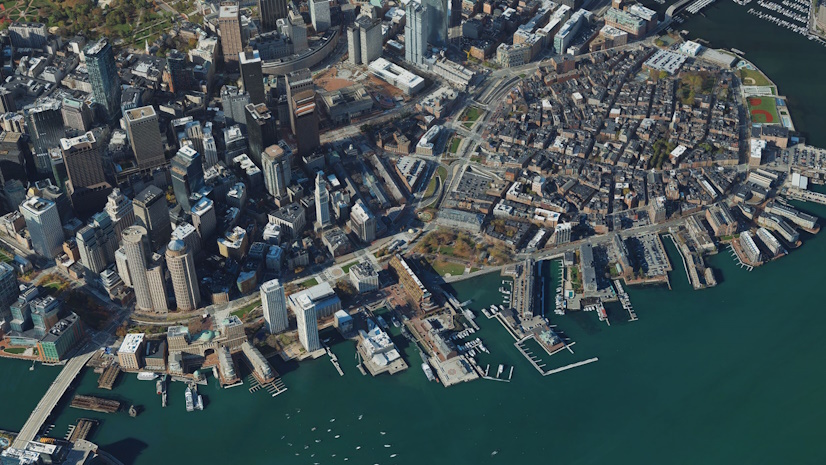
Reality mapping produces highly accurate digital representations of the real world in a fully automated way. ArcGIS Reality Studio 2025.1 introduces an advanced suite of editing tools designed to boost both mesh quality and productivity within the realm of reality mapping. These tools not only offer the ability to refine results further but also empower users to work effectively on complex sites that contain thin structures, transparent or reflective materials, and moving objects.
This article outlines best practices for improving mesh products, providing essential guidelines and examples to help you select the right editing tools and master their functionalities. Furthermore, we will discuss effective strategies for combining multiple editing actions in sophisticated scenes to achieve optimal results.
For more detailed information, please also refer to the documentation.
Improving Mesh Quality with Simple Edits
In many instances, implementing just a few straightforward changes can lead to significant improvements in mesh quality. This is especially true for highly reflective or transparent surfaces like glass facades and roofs, as well as surfaces that lack distinctive textures. In such cases, users can easily draw correction geometries directly onto the mesh, allowing for targeted adjustments within Reality Studio. When the reconstruction is updated, these corrections will be seamlessly incorporated, resulting in a corrected mesh. Additionally, multiple corrections can be integrated simultaneously, streamlining the workflow and improving efficiency.

The images above illustrate the workflow of in-app editing: The left image depicts a mesh with holes in the glass facade of a building, which is challenging to reconstruct automatically due to its reflective surface. In the central image, a correction geometry is drawn (white), which follows the actual building shape. After reprocessing, these corrections are taken into account and the improved mesh is visible, as shown in the right image.
Improving Mesh Quality with External Tools
In certain scenarios, more sophisticated corrections may be necessary, especially when the area of interest features detailed structures or complex objects such as bridges and architectural landmarks. To effectively tackle these challenges, users can leverage external mesh editing tools. Using quality control geometries, areas containing artifacts can be marked and then exported as edit packages. Using a third-party mesh editing application, the exported mesh pieces can then be enhanced. Once completed, the edit packages can be seamlessly reintegrated into the original mesh.
This workflow not only facilitates detailed manual modelling but also offers the flexibility to incorporate existing 3D models of structures, to remove unwanted geometries, or to add new features.
Tip: Make sure to create a backup of your edit package to be able to revert changes if needed.

The example above shows an architectural landmark for which there may be a special interest in reconstructing it and its intricate details with the highest possible quality (shown in A). A quality control polygon is drawn to mark this region of the mesh. It is specified when exporting the edit packages to include only the minimum context around the marked defects, enabling effective editing operations. The OBJ file of the edit package can then be opened in an external mesh editing app for manual edits (shown in B). After saving the changes to the same OBJ, the edit package is passed to the reconstruction for integration of the edits into the mesh. The final mesh (shown in C) shows the corrected geometry.
Tip: The quality control area does not need to be precise, but can approximately outline the affected area
Unleashing the Full Potential of Editing Tools through Combination
Along with the new tools, the existing feature for adding water bodies also offers powerful capabilities. This functionality significantly enhances the reconstruction quality of water bodies, with the help of users providing a coarse or precise outline of their shape.
While all these features offer robust stand-alone solutions, they can also be combined to maximize their effect. In the following, you can find useful tips for working with various editing tools.
- Editing multiple areas in Reality Studio
You can create several corrections within a single correction geometry layer and apply them all at once to update the reconstruction results. - Editing multiple areas with an external application
You can create several edit packages at once by marking multiple different locations within one quality control geometry layer. - Combine various editing tools
Multiple edit actions can also be combined, for instance, when introducing general corrections first and then applying more complex edits. When doing so, water body and correction geometries should be applied first, as edit packages will take precedence and fully replace the edited areas.
Tip: All methods of improving mesh results can also be applied iteratively, following previous editing sessions

The image above illustrates the combination of editing tools: On the left-hand side, the quality control area for external editing is highlighted in red. On the right-hand side, a water body geometry is shown above the lake in blue.
Summary
In this article, we explored different options for improving meshes through manual editing. By following these guidelines to select the right editing tool – or a combination of them -, users can optimize the balance of enhancing the quality of mesh products and keeping efforts minimal.
Mesh editing within Reality Studio
- Best for: Simple edits requiring only a few correction geometries
- Examples: Flat building facades or roofs
- Benefits: Quick and efficient, no third-party application needed
Mesh editing with external tools
- Best for: Complex objects, intricate structures
- Examples: Bridges, architectural landmarks
- Benefits: Allows for advanced editing and removing or adding geometries, existing 3D models can be incorporated


Article Discussion: